Gain access to personalized product screening, the best pricing, rewards, and more!
Most Effective Products
How To Use Pesticide Dust Properly

Dusts are a highly effective pesticide formulation for pest control treatments. Many problem pests take to products delivered in dust form and often prefer them to the other formulations of pesticides you’ll find. Some common pests effectively controlled via insecticidal dust are roaches, fleas, bed bugs, and ants.
Insecticidal dusts offer many benefits: they don't need to be mixed, they are long-lasting, and they continue to effectively kill pests long after application. Aside from longevity, they are also safer to use compared to most conventional pest control methods. There are even insecticidal dusts with organic and natural ingredients.
However, it's important to note that for dust applications to be effective, you need to correctly apply the dust or else you won't get the desired results. Below, we will share with you how to properly apply pesticide dust so it gets the job done against your target pest.
Steps For Proper Dust Application

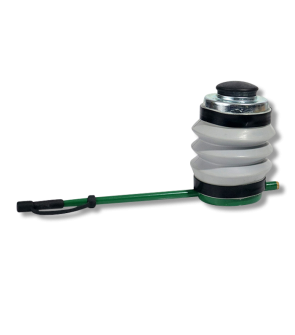
Most dust products sold have a specially formed top that serves as an applicator. However, the applicator tip is often not as effective as a handheld duster. Handheld dusters can disperse the dust better and more precisely to where you want it to go.
Keep in mind that pesticide dusts are meant to be applied to voids, cracks, and crevices or hard-to-reach/inaccessible areas, like weep holes, wall voids, or behind and under appliances. Dust applications are also not meant to be seen, so you should not puff too many times, or else you'll create a heavy layer or pile of dust, which pests are more likely to avoid.
We recommend using a handheld or electrical duster for a more convenient application.
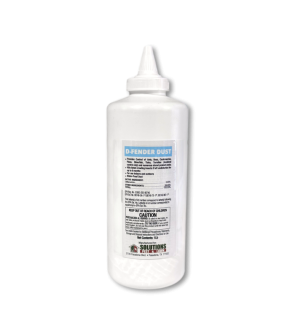
- Step 1: To use the handheld duster, start by popping or twisting off the rubber top. Fill the duster about halfway with your preferred choice of dust (like D-Fender Dust Insecticide), and then secure the cap back to seal the product. Remember that you do not want to fill the duster; you want to leave enough room for air circulation. If you overfill the duster, it will not have the air to puff the dust.
- Step 2: Next, remove the protective cover on the tip of the straw and gently squeeze the bulb to start dusting.
- Step 3: When applying dust to cracks, crevices, and surfaces, gently squeeze the duster to ensure the application of very thin layers of dust. When dusting correctly, you should barely be able to see the dust emerging from the tip of the duster.
- Step 4: Treat between carpet and baseboards, cracks and crevices, around plumbing, and in other hard-to-reach places until the area is thoroughly treated.


