Gain access to personalized product screening, the best pricing, rewards, and more!
Most Effective Products
Common Insects in Fencelines
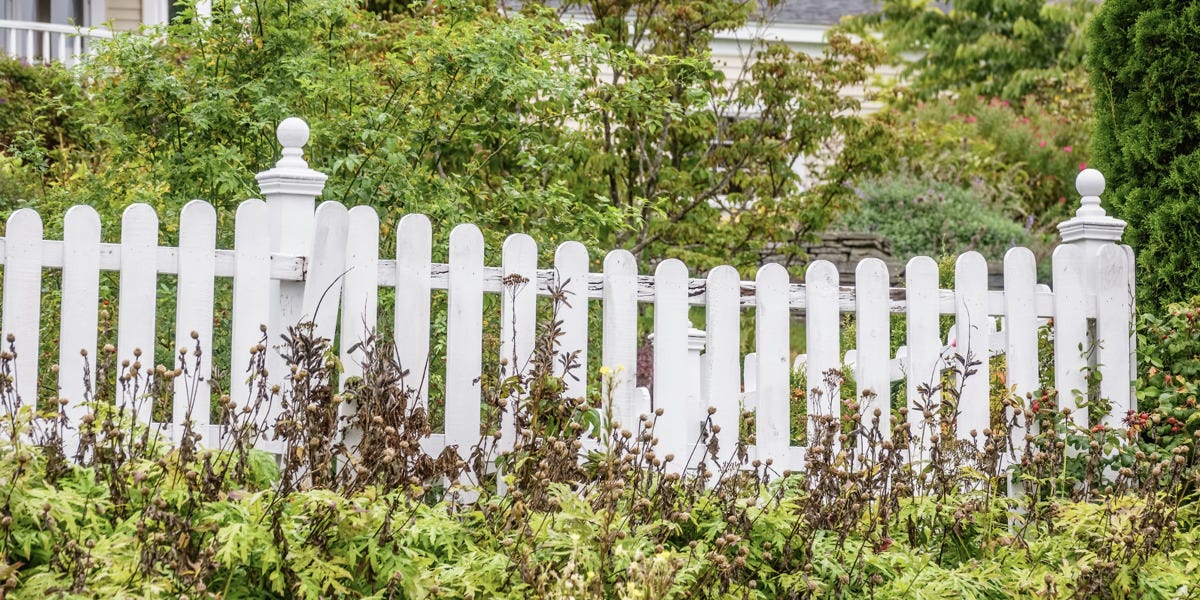
A well-maintained fence not only enhances the aesthetic appeal of your home, but also adds security and privacy. However, over time, fences can succumb to wear and tear from the weather, time, and sometimes pest activity.
With so many different pests out there, how do you know which bug is eating away at the wood in your fence or damaging it?
The most common bugs that infest fences are bark beetles, carpenter ants, carpenter bees, horntails, powder post beetles, termites, and wood roaches.
When your fence starts to show signs of damage it's time to begin proper pest management and make those needed repairs. Learn how to control bugs that are damaging the wood in your fence with this DIY guide.
If you are not experiencing a pest here, then contact our customer service team through phone or email for professional advice and treatment.
Bark Beetles
Given the long duration of feeding that bark beetle larvae does makes this pest a problem with wooden fences. Extensive damage can be seen with the long galleries these pests make as they travel and feed on the wood resulting in weakened and damaged fences.
Identification

Under their elytra (wing covers) they have a pair of wings, which are capable of flight. Bark beetles also have mandibles for chewing wood.
During their larvae stage they are legless, c-shaped, pasty white colored, and have a dark brown head on their grub-like bodies.
Inspection
Bark beetles will infest stressed or weakened wooden fences and fence posts made out of wood.
Any logs or trees near fences are other sites this pest would normally infest.
Treatment
Step 1: Replace Damaged Fence

Burn or otherwise destroy parts of the fence that were removed due to damages, weakened structural support, and holes on wood since these pests can continue to grow in the removed wooden fence parts.
Parts of your fence that are left out in your yard can cause bark beetles to move on to trees and wood piles.
We also recommend pruning decaying or infested tree bark, branches, and logs showing signs of bark beetle activity.
Step 2: Make Pesticide Application

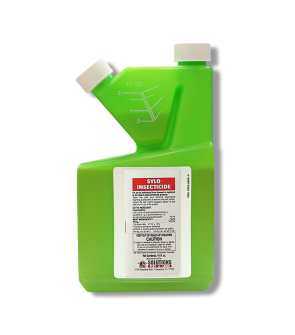
Sylo Insecticide is a synthetic pyrethroid insecticide that works to kill pests like bark beetles on contact and can prevent these pests from infesting for up to 90 days after application.
To control bark beetles in trees and fences, apply a 0.1% emulsion of Sylo Insecticide. This can be done by mixing 1 oz. of Sylo Insecticide with 1 gallon of water.
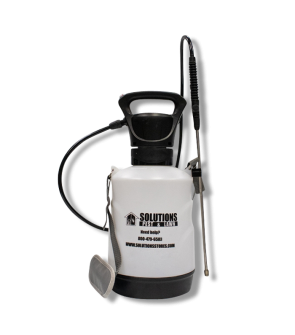
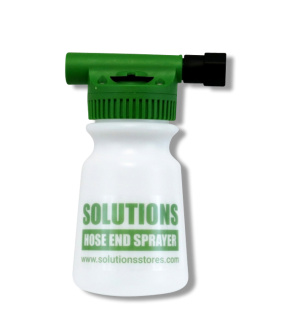
To treat the surface of trees and fences, we recommend making applications with a handheld pump sprayer or hose-end sprayer for more elevated sites. For active infestations inside of these sites, you will need to use a type of injection equipment and drill.
To mix, fill your handheld pump sprayer halfway with water then add the measured amount of Sylo Insecticide. Next, pour in the remaining half of water and shake until the solution is mixed.
To mix in a hose-end sprayer, fill it first with only the proper amount of product. Then re-connect the reservoir and spray until the correct amount of water is reached.
Thoroughly spray the bark of the tree and wood of the fence where bark beetles are expected to invade, but not to the point of runoff.
To make interior applications, you will need to drill until you find areas where bark beetles are active then inject the Sylo Insecticide emulsion.
Keep children and pets away from treated areas until completely dry.
Carpenter Ants
Carpenter ants are a common sight in and around fences made out of wood. One of the largest species of ants, these pests live in large colonies leading to a greater increase of structural damages with their nest-building activities.
If left untreated, carpenter ants can move into the wood of your house to spread their nests further. The more there are, the faster they can chew through wood and possibly bite you or your family.
Identification
Carpenter ants usually are big black ants, but they can range in different colors likebrown, red, yellow, orange or a combination of black and red. They reach 0.25 to 0.75 inches long, and have a 3-segmented body separated by a narrow waist.
Swarmer carpenter ants (reproductive ants) have four wings with the hind wings being shorter than the front. These ants are possible for flight and much like the worker ants they also have segmented antennae that curve.
Inspection

Treatment
Step 1: Eliminate Moisture

Trim overgrown tree branches and shrubbery away from your fence as shadows from these foliage creates moisture in soil around wood.
Point rain gutters away from your home's foundation and fence line to avoid pools of standing water. Address slopes in land around fences and throughout your property to further avoid water buildup.
Step 2: Replace Bad Wood
Fence maintenance can help eliminate potential homes for carpenter ants.
Replace any weakened or damaged wooden parts of your fence.
Destroy any wooden parts removed from the fence that were broken or had carpenter ants in them as they can continue to survive in these parts.
Step 3: Set Ant Bait

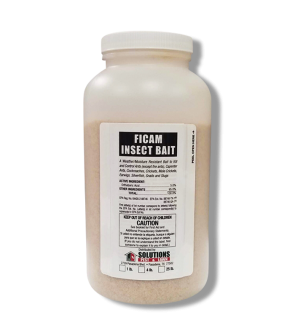
Ficam Insect Bait is a ready to use granular insecticide that eliminates pests like carpenter ants with its active ingredient orthoboric acid 5%.
Determine how much Ficam Insect Bait to use by measuring the square footage of the treatment area. To do this, measure the length and width of the treatment area in feet then multiply them together (length X width = square footage).
Create a perimeter treatment around the exterior of your home and scatter Ficam Insect Bait in ornamentals, especially those near fences.
Apply at a rate of 4 lbs of Ficam Insect Bait per 1,000 sq. ft. for perimeter applications. To make applications in ornamentals, use 6 oz. of product per 100 sq. ft.
Best to make these applications with a handheld spreader for better control.
Create a perimeter band by spreading the product in a band that is 2 to 4 feed wide around the structure.
Also apply product in a 2 to 4 foot band around all trees, stumps, firewood piles and other locations where carpenter ants may nest.
Scatter Ficam Insect Bait to the soil underneath flowers.
For maximum effectiveness, do not irrigate the treated area immediately after application.
Step 4: Apply FiPro Foaming Aerosol

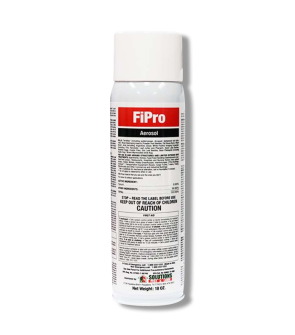
FiPro Foaming Aerosol is a ready to use termiticide/insecticide formulated with fipronil that rapidly expands into a foam to kill carpenter ants and other pests.
Shake the can well before use then attach the application straw into the nozzle tip.
Drill 1 or more holes into fences to reach galleries, cavities, harborages, and voids where this pest has been active. You may also treat exposed surfaces where carpenter ants have been active.
Insert the tip of the straw into these holes or exposed surfaces where this pest has been active.
Spray for 5 seconds then hold the straw in place for 8 seconds to give enough time for the foam within the straw to dispense into the treatment area. Wipe away the excess foam that came out of the hole.
To eliminate foraging carpenter ants, apply the foam up to a 6” length of their ant trail. Allow the foam to dissipate before you leave the treated area.
Wait until 30 days have passed before reapplying this product. If no activity occurs, then fill up any openings in wood with a proper weatherproof sealant.
Step 5: Spray with Pyrethroid

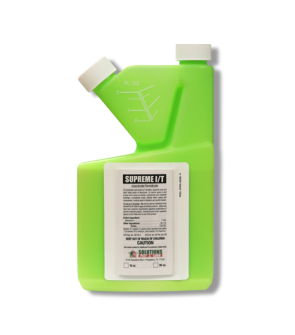
Supreme IT is a broad-spectrum insecticide concentrate made to eliminate up to 70 types of pests, including carpenter ants. When dried this product will create a 90 day residual barrier that will kill and repel pests that contact treated areas.
Apply 1.0 fl. oz. of Supreme IT in 1 gallon of water per 1,000 sq. ft. of fence lines.
As a concentrate, this product will need to be mixed with water in a handheld pump sprayer.
To mix it, simply add half the amount of water and the needed amount of Supreme IT into the sprayer. Next, pour in the remaining half of water, close the lid, and begin shaking until the solution is mixed.
Spray 3 feet up the exterior surface of the fence and 3 feet out on the ground next to it until wet. Do not spray to the point of runoff.
Repeat application only if there is evidence of renewed carpenter ant activity and not more than once per 7 days.
Carpenter Bees
While most bees do not create property damage there is one that can, which is the carpenter bee. Not to be confused with bumblebees, carpenter bees are a type of pollinator that help to spread pollen just without the benefit of producing honey.
These bees achieve their name by their exceptional ability to drill into wood to lay eggs and make tunnel-like nests. The females of these species are equipped with a stinger to sting people with whereas the males do not have stingers.
Identification

In size, carpenter bees measure between ¾ to 1 inch in length. The thorax is brightly colored with yellow hairs. If it is a female they will have smooth, straight stingers whereas the males possess none.
Inspection

Treatment
Step 1: Aerosol Treatments
Carpenter bees can travel extensively throughout fencing so taking it apart can be more of a costly decision. For this reason, we recommend first using insecticide aerosols like FiPro Foaming Aerosol to eliminate these pests in the wood.
When applying FiPro Foaming Aerosol or any other type of insecticides it’s best to wear a professional bee suit for full protection from carpenter bees.
Insert the FiPro Foaming Aerosol straw into the area where carpenter bees have drilled their holes and made galleries. Spray for 5 seconds then hold the straw in place until 8 seconds have passed.
Leave the foam on the wooden surface of the fence until it dissipates.
Step 2: Residual Surface Spray and Gallery Treatment
Several days after the first initial treatment, make an application with an insecticide that will leave behind a residual barrier and can be used in gallery holes of carpenter bees.
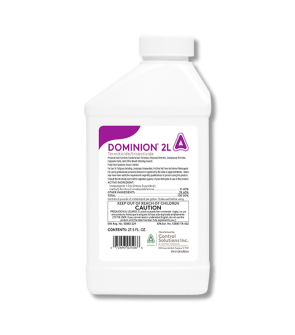
Dominion 2L Insecticide is a non-repellent insecticide and termiticide that creates an undetectable barrier around structures and treated areas from various pests, including carpenter bees. After drying, treated areas will be protected and eliminate pests that contact these areas for 3 months after application.
To get rid of carpenter bees, use a 0.1% solution or foam of Dominion 2L Insecticide. To achieve this, mix 0.6 fl. oz. of product with 1 gallon of water.
For easier application, we recommend using the concentrate version with a handheld pump sprayer. Lightly spray or mist the mixed Dominion 2L Insecticide directly into the carpenter bee gallery entrance holes.
When spraying, go ahead and cover the entire wood surface of the fence to the point of wetness, but avoid applying to the point of runoff.
Following treatment, entrance holes may be plugged with small pieces of steel wool or wood putty to prevent reinfestation.
Horntails
Despite their large, threatening stinger the horntail wasp is harmless and will not sting people. That spear on its rear is intended for drilling into wood to lay eggs.
The larvae then tunnel through the wood for the next 2-3 years until it is fully developed, which leaves behind various damages in fences. At the same time the female horntail deposits her eggs, she also introduces a wood-rotting fungus that further damages the fence.
Identification
Horntails are moderately large wasps that measure about 1.5 inches. Their cylindrical bodies range from black, blue, or brown with yellow, red, or orange markings.
Both the male and female horntail have horn-like projections at the end of their abdomen. Females will have an additional projection, called an ovipositor, which is used for laying eggs in wood.
Larvae are white, legless grubs that have a small spine at the end of their elongated body.
Inspection

Larvae then develop under the wooden surface of the fence for 2 to 3 years leaving behind several tunnels packed with fine wood dust. When fully developed, adults will leave behind round, clean-cut holes from where they emerged in the fence.
Treatment
Step 1: Repair Fence
Since horntails do not attack healthy wood, management should be focused on first limiting their food and breeding source.
Removing decaying wood around fences like trees and parts of the fence with visible signs of activity or decay is the best thing to do against horntails.
Unfinished fence wood would be best treated with a borate based insecticide to control horntails breeding activities.
Step 2: Apply Residual Insecticide
If you have seen evidence of horntail activity, the next best thing to do is apply a residual insecticide to repel and eliminate any wasps that emerge from the fence.
Keep in mind that continual re-applications are necessary, because horntail larvae will take several years to develop before emerging out of wood.
However, by replacing parts of the fence and making consistent applications you can control and prevent these pests.
We recommend using Supreme IT to control wasps in fences and trees since it will leave behind a 90 day residual rate.
To get rid of wasps in fences and trees, you will need to use a 0.06% dilution. To do this, mix 1 fl. oz. of Supreme IT with 1 gallon of water in a handheld pump sprayer.
When Supreme IT has been mixed, spray the cracks, crevices, and holes in fences where wasps may nest to the point of runoff. Saturate these openings and contact as many horntail wasps as possible.
To control horntails in trees, spray up the tree trunk until the bark is completely wet. Spray any possible openings you see in trees and the area around the hole to eliminate possible wasps.
Reapply every 90 days to prevent and eliminate any possible horntails in fences and trees.
Step 3: Apply Wood Putty

Applying wood putty to holes or cracks in fences will deter horntails from returning to the nesting area.
Powder Post Beetles
Known for their ability to turn wood into a fine powder, the powder post beetle is a wood-boring pest no one wants to experience.
Even worse, these pests remain active in wooden fences for several months to several years due to their long-life cycle.
Identification
Powder post beetles have long, narrow flat bodies that are less than ¼” in size.
These beetles are reddish-brown to black and have a hood-like body segment behind their heads that makes them very visible from a distance.
Powder post beetle larvae are creamy white, c-shaped grubs with 3 pairs of legs right behind their heads.
Inspection
Powder post beetles mainly invade dried and hardwood surfaces such as your fence.
Treatment
Step 1: Remove Infested Wood
Each piece and part of the fence showing signs of powder post beetle activity should be completely removed and replaced.
These may be difficult to identify as larvae can take several weeks to show signs of activity. For this reason, you will need to treat the rest of the fence with a residual insecticide. You will also need to treat openings with an insecticide as well.
Step 2: Treat Holes in Fence
Unsealed openings such as cracks, crevices, or holes are more likely to have powder post beetle activity.
Using FiPro Foaming Aerosol will kill powder post beetles that are in the fence with its expansion ratio of 30:1.
Simply connect the straw into the nozzle then insert it into voids, damaged wood, spaces between wooden elements of the fencing, junctions, galleries, and other exposed surfaces where this pest has been active.
You may need to drill holes to access powder post beetle galleries in the fence.
Spray for 8 seconds then wipe away excess foam that came out of the hole.
If needed, this product can be reapplied to previously treated sites if activity is found 30 days after the previous application.
Step 3: Apply Boracare Termite Treatment
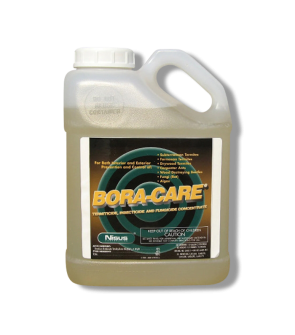
Using a residual insecticide on the surface of your fence will help to eliminate powder post beetles that emerge and stop any breeding activities. We recommend using Bora-Care Termite Treatment.
Apply 1 coat of a 5:1 Bora-Care solution to the point of surface saturation to all structural wood surfaces using a brush, spray or mist.
To create a 5:1 ratio, mix 5 gallons of water to 1 gallon of Bora-Care
Apply 2 coats of Bora-Care solution to those surfaces where access is limited to 1 or 2 sides of structural wood members.
Thoroughly wet the surface of the fence to the point of runoff.
Allow first application to dry by waiting at least 20 minutes between applications
Termites
Drywood and subterranean termites are the most common termites to infest wood fences for homeowners. With their eating and tunneling habits these pests can drastically affect the integrity of your fence and make it an eyesore.
Not to mention the costly repairs to fencing and potentially your home if the infestation were to spread.
Identification
For a visual aid refer to the image above: On the left is the drywood termite and on the right is the subterranean termite.
Drywood and subterranean termites have similar appearances, however the soldier and alates differ.
Both drywood and subterranean termite workers have soft bodies that are colored light yellow to creamy white. They are both blind and have a head larger than their body.
What separates the workers of these species are their size: Drywood termite workers measure about 3/16th of an inch long whereas subterranean termite workers are smaller in size at ¼ to 3/8th of an inch.
They continue to be larger in their next stage of life as well with drywood termite alates measuring one quarter of inch long and the subterranean termite alate measuring 1/4th of an inch long.
Drywood termite alates have a thicker appearance and contain wings that are darker in coloration than subterranean termites. They also contain 3 to 4 veins in their wings and have an orange-brown head and pronotum.
Subterranean termites appear thinner than drywood termites and have lightly colored wings that contain a single dark vein that runs parallel to the top of the wing. Their heads and protonum are one single dark color with no other coloration.
Inspection
Drywood termites like to build their nest in isolated wood pieces like your fence. They do not require contact with the soil since they will live in the wooden fence.
Subterranean termites like to live and build their nest in the soil under fences. These termites will build mud tubes to move from the ground to the fence to forage for food and moisture.
Treatment
Step 1: Maintain Fence and Yard

Termites in the soil or in your fence can detect any additional wood sources to feed on, especially if they are wet and rotting.
For this reason, you will need to remove any dead branches on soil, prune overgrown woody ornamentals and tree branches near or above the fence, properly dispose of tree stumps, and other yard debris.
Any wood sitting on the soil such as firewood will need to be placed on a concrete slab or metal firewood stand. Keep firewood and other lumber away from the fence and foundations of other structures.
Ornamentals with mulch near fences are an open invitation to termites, so we recommend replacing it with a material they cannot munch through like gravel.
It may also be best to relocate large and hefty shrubs since they can make the soil cool and moist, which is attractive to termites.
Any damp areas near and around your fence will need to be properly addressed.
Lastly, any fencing that shows damage from water and weather activities or weakening of structure would best be replaced with new wood.
Step 2: Perform Trench Treatment

You may need to use a shovel or pick-ax to dig up the soil and a 5 gallon bucket to pour the solution with.
Dig a trench around your fence that is 6 inches deep and 6 inches wide. Apply 5 fl. oz. of Supreme IT with 4.9 gallons of water in a 5 gallon bucket.
Pour the mixed products over the soil in the trench then immediately fill it back in with dirt.
Continue with this process until the entire length of your fence is treated.
Step 3: Treat the Fence
The easiest way to kill drywood and subterranean termites in wooden fences is to apply a residual insecticide like BoraCare Termite Treatment.
To prevent and kill active infestations of termites in fences, use a 2:1 mixing ratio. For this solution, you will need to mix 2 gallons of water with 1 gallon of BoraCare Termite Treatment.
Apply 1 coat of Bora-Care solution to the point of surface saturation to all wood surfaces. Apply 2 coats of Bora-Care solution to heavily infested areas and to those surfaces where access is limited to 1 or 2 sides of wood members.
Allow first application to dry by waiting at least 20 minutes between applications.
Apply only to bare wood or to wood surfaces where an intact water repellent or finish is not present. Remove paint or finish prior to application.
Step 4: Set Out Termite Traps

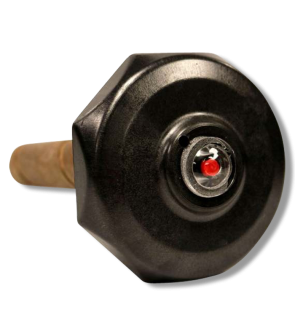
The Red Eye Termite Monitoring Station is an in-ground termite station that contains a high cellulose attractant. When termites feed on it the red eye will disappear from the clear window alerting the user of an active termite infestation.
You will need the help of a power drill and 2” auger bit to install the product into the ground. We also recommend using this product with FiPro Foaming Aerosol to kill termites when detected in the station.
Place one of the Red Eye Termite Monitoring Station every 8 to 10 feet apart and at least 5 feet away from the drip edge of the fence if there is one. Several stations should be used along the entire length of the fence.
To install the station, drill into the ground so that the dome of the Red Eye Termite Monitoring Station lays flat on the ground.
If you see the red eye disappear from view then apply FiPro Foaming Aerosol into the port on top of the dome. Spray for at least 8 seconds or until you think the termite station is full.
Replace the Red Eye Termite Monitoring Station every 30 days to keep up with regular monitoring practices.
Wood Roaches
Wood roaches are not fond of coming indoors and are more of a nuisance with their ability to reproduce rapidly. These roaches do not cause serious damage to the woodwork of your fence or spread disease.
This is because these pests prefer to live around wood and feed on decaying organic matter and not trash like other roach species. However, wood roaches can cause an onset of allergies for individuals with asthma or those allergic to dust.
Identification
Wood roaches are dark to chestnut brown roaches with a white to yellowish stripe on the outer edge of their body.
Often they are confused with American roaches since they both share somewhat the same coloration, a pair of long antennae, spiny legs, and have a flat, oval-shaped appearance.
Wood roaches are different from American roaches in terms of size. Wood roaches measure ¾ of an inch whereas the American roach are larger at a size of 1.5 inches.
Inspection
Wood roaches prefer to live outdoors in areas that provide consistent moisture such as in the crevices of decaying wood fences or under loose wood surfaces on fences.
They can also live in other decaying or damp wood matter near fences like wood piles, under the bark of trees, in mulch, and logs.
Treatment
Step 1: Clean Up Yard

Keep your yard clean of these materials with regular raking and pruning overgrown tree branches or dead parts of the trees and shrubbery.
Pick up any fallen plant debris and properly remove any stumps or logs in your yard to limit food sources and habitat for wood roaches.
Step 2: Apply Supreme IT
After wooden items are removed and the yard is maintained, treat your fence with Supreme IT.
We recommend that you create a barrier treatment around your fence to repel and kill wood roaches.
Use 1.0 fl. oz. of Supreme IT in 1 gallon of water per 1,000 sq. ft. of fence. You will need a handheld pump sprayer to mix and apply this product with.
Spray 3 feet up the fence and 3 feet out on the ground next to it until wet, but not to the point of runoff. Also, treat any cracks and crevices in the wood fence.
Reapply when 90 days have passed from the first application to continue to eliminate wood roaches.
Key Takeaways
Does Wood Fence Attract Bugs
- Most of the time wood fence posts and railing are the most prone to insect activity and can draw them to your property if not treated properly.
What Can I Spray on Wood For Bugs
- We recommend using either borate based products like BoraCare Termite Treatment or a residual insecticide like Supreme IT depending on the pest you are trying to control.
What Bug is Attracted to Wood Fences
- The most common bugs to invade wooden fences are carpenter ants, drywood termites, subterranean termites, powder post beetles, bark beetles, horntails, wood roaches, and carpenter bees.


